Sometimes cars can be very frustrating. I’ve just gotten back from a test drive after installing the new electronic boost control solenoid and I still can’t control boost with it.

Everything went on smoothly, and selecting solenoid test from the ebc menu has the solenoid click on and off as it should.

I have checked repeatedly that everything is connected properly but changing the settings does not raise the boost level.

The only solution is to experiment with connecting the compressor to the intake like when I was checking for leaks to see if the solenoid is doing anything at all. That and a lot of searching through forums.

I have finally identified and fixed the boost leak! After watching a few videos online, I purchased a series of pvc plumbing end caps and epoxied an air hose fitting to one that would fit in place of the intake pipe between the turbo and afm.

A compressor was then connected and the regulator adjusted to provide 15psi. Safety glasses are a must in case anything pops out. The idea is that any leaks will be audibly apparent and pinpointed by feeling for the air escaping or spraying soapy water to make bubbles. Immediately, a loud hissing was heard from near the blow off valve.

Disassembly revealed the connecting pipe was undersized and had been padded with an extra piece of rubber hose. The result was not much of a seal and a leak at modest pressures.

With the bov hose plugged up and the vacuum lines tidied, the car is driving better. It comes on boost slightly earlier, with the top end noticeably improved.

Interestingly, despite feeling faster, the car is now making about 1 psi less boost and the Turbosmart eboost controller in the cabin is now reading vacuum as well as boost. Eliminating wastegate creep with an electronic boost controller and upping the peak boost from ~14.5 psi to 16/17 psi should see a big spike in mid range torque. It might be worth trying to reconnect and troubleshoot the Turbosmart unit now that it is reading properly.

I spent last week installing a big brake upgrade to the Sileighty. Since I’ve owned the car, it has been clear that the power of the engine far exceeds the stopping power. The job was fairly straightforward, but some parts were harder than others. The front of the car is generally a lot easier to work on than the rear. The S13 Brake Upgrade(s) page has been rewritten to encompass the Z32 brake swap from the grey 180sx a decade ago and this latest swap. The result is an exhaustive page that goes into a lot of detail. The brakes are now so much better.

wp-1471837455222.jpg

All of the components have arrived to make the in dash engine monitor as discussed in the last post. Progress will be slow at first as work is really busy, but it will eventually come together and everything will be documented in a new page.

I’m still convinced something is not quite right with the engine. I feel confident in eliminating a pre-turbo exhaust leak and the VTC not working as causes. I now think it might be a boost leak in the intake piping. The lumpy idle, rich running and lag are all consistent with this. In the near future I will construct some sort of testing rig to find out.

Another new page has been added, in the form of information on S14/15 VTC black top motor into an S13 chassis. This isn’t a definitive guide, as I haven’t done the swap myself, but rather a collection of tips I have picked up since owning the Sileighty. It looks at the differences in the various generation motors, pros and cons of each, and details how the VTC system functions and how to diagnose it if it’s not working. The page is a culmination of many late nights and hours searching online. I hope it is useful to someone in the future to save them the same troubles.

Today I ordered the first parts for a long term project. I intend to make an Arduino driven colour LCD that sits in the double DIN stereo slot and displays a range of engine parameters. When I started this site over a decade ago, my electronics knowledge was limited. I now have a great understanding of microcontrollers and regularly complete complex projects. I have a 3D printer, laser cutter and CNC router, which means I can make my own parts to a high standard. Importantly, I can design and make my own PCBs for electronics projects.

The example I have seen which has sparked my interest can be seen here:

http://forum.4dsystems.com.au/forum/forum-aa/tips-and-important-information/anna-s-sandbox/42911-4d-systems-as-an-automotive-multi-gauge-display

Thanks to GCG Turbos for popping the new wastegate in the mail on Monday to arrive today. A fast turn around when ordering on the weekend. I have had to deal with a few different suppliers in the last month, the majority of which have been great. I will add something to the new resources page that gives a simple review of parts suppliers. On this page there are already links to FSM/Service Manuals that have been converted to searchable text. More to come.

The wastegate went on in under an hour, including stuffing around taking pics for this site. A new external wastegate page has been created to cover the install and the underlying theory of wastegates. The bad news is the car doesn’t feel any faster despite the pre-turbo exhaust leak being eliminated. I think the tune of the car is just that bad. The turbo starts to spool early in the rev range and then a flat spot exists for a second or so before the power picks up. Frustrating.

I have almost finished bringing all of the original content from ten years ago over to this site. I even created some new animations to flesh out the suspension guide page. Enjoy!

The turbo parts went back together smoothly, and revealed the manifold to wastegate leak is worst than first thought. When off, the wastegate seemed to be pretty loose and jiggly too. I’m treating these issues as good news, however, because they are consistent with the cars lack of low/mid range torque.

I have ordered a new Turbosmart ultragate38 from GCG Turbo. The assumption has been made (perhaps stupidly) that it will be a similar physical size to the cheap item currently fitted, allowing a speedy install.

Whether it brings the car to life or not, time will tell. It is an exciting question.

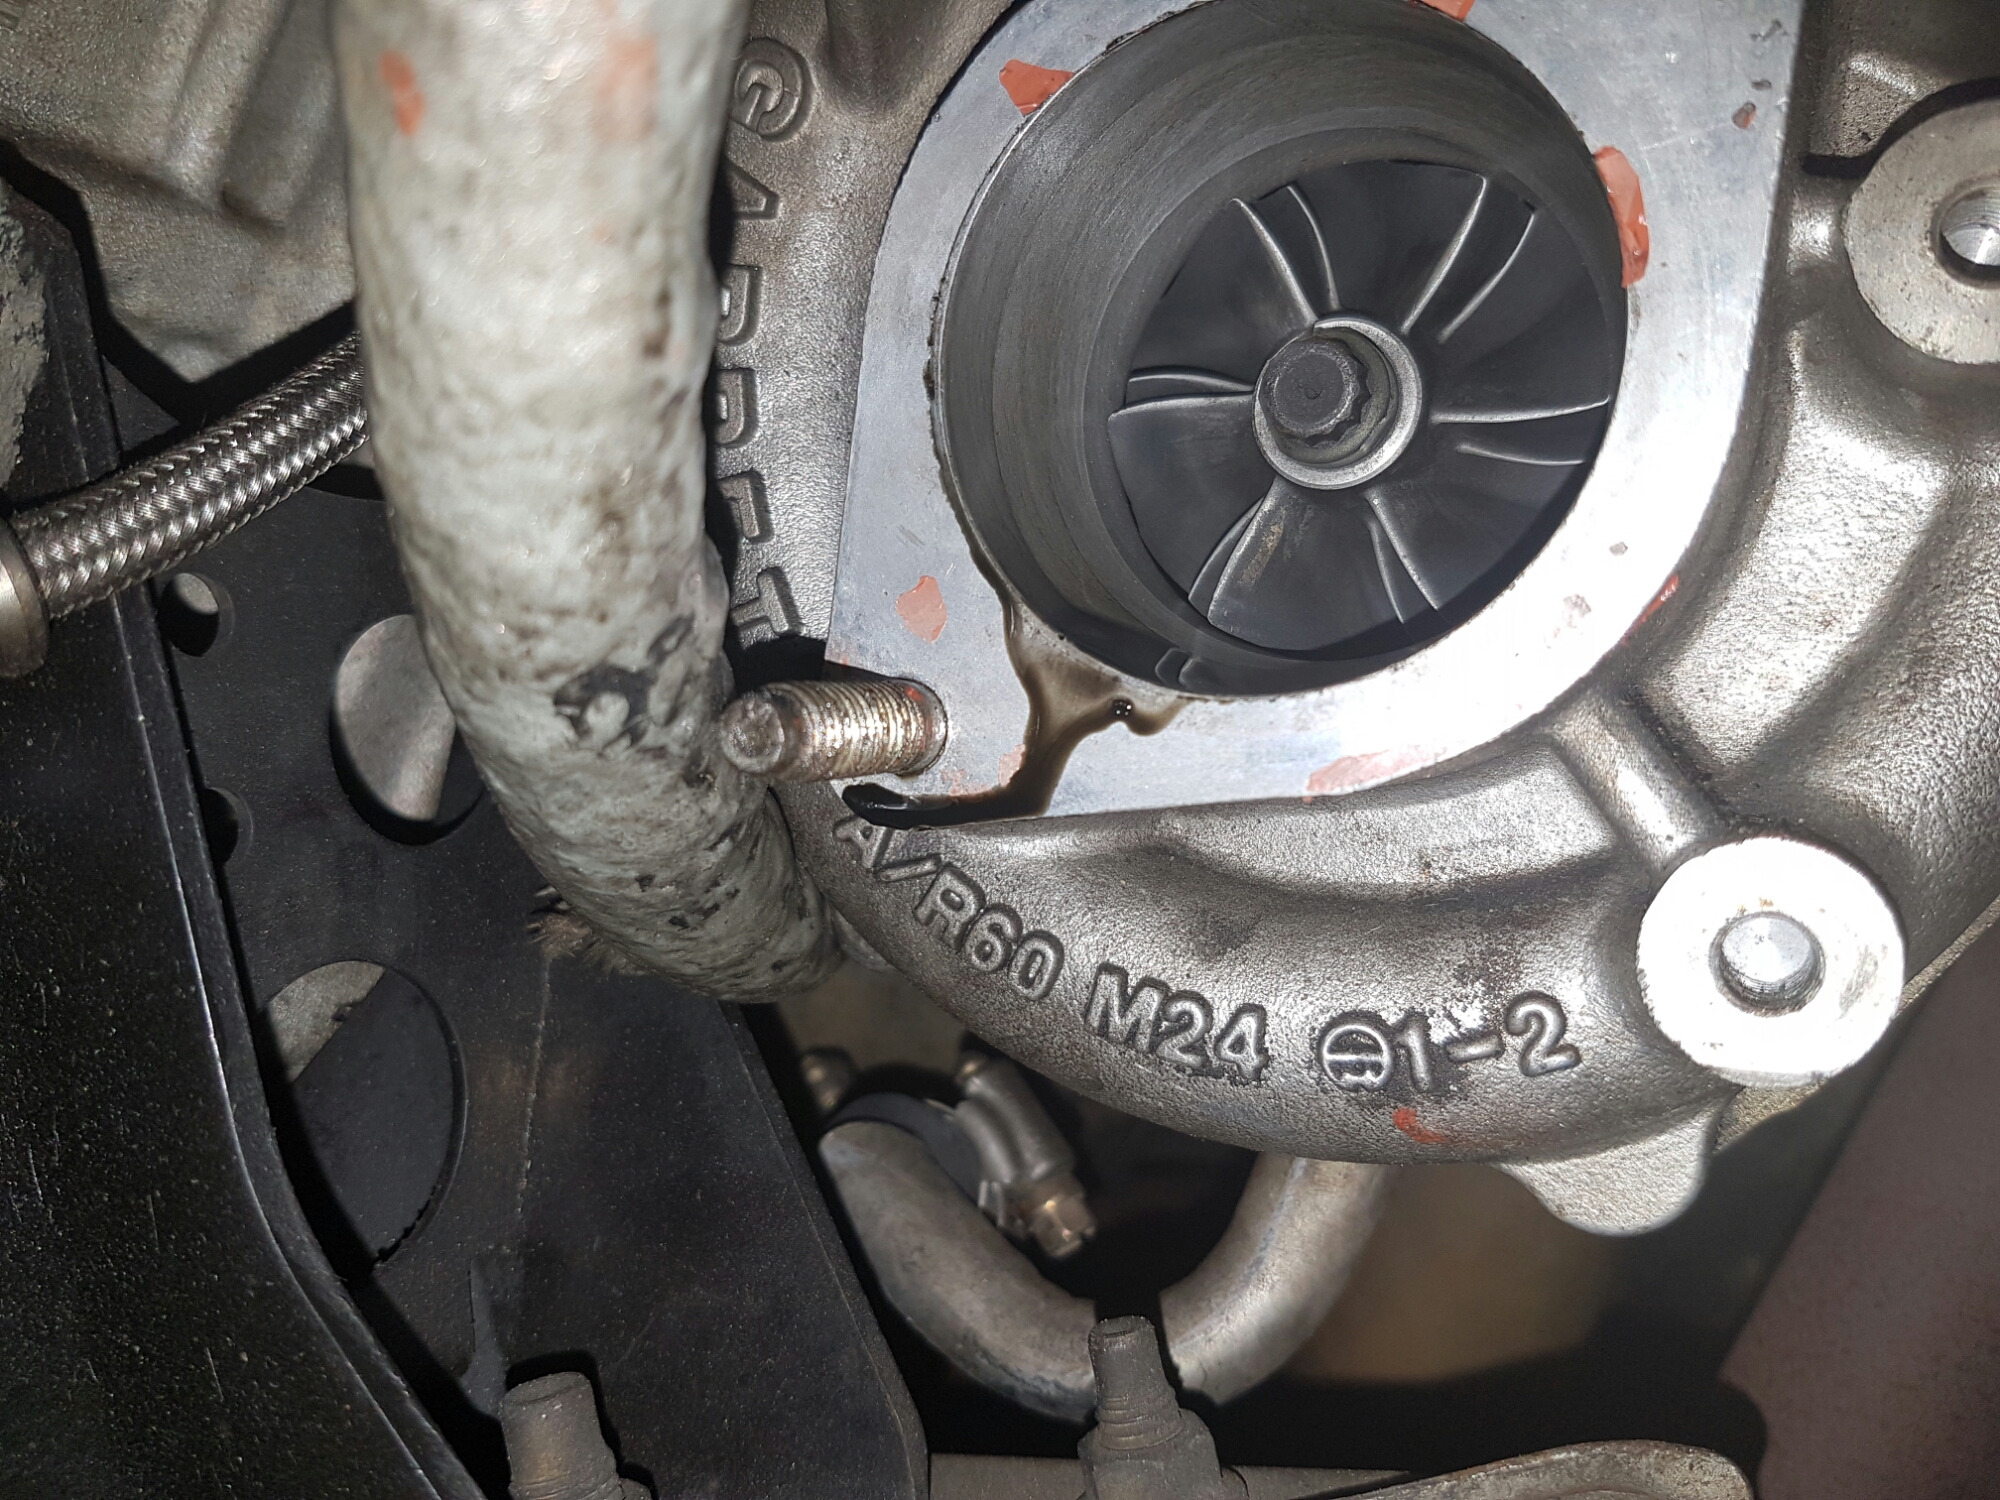
Work is busy so progress is slow. Midweek, I pulled the wastegate off and the some of the inlet piping to get a good look at the turbo.

20160802_205443.jpg

Internet searching indicates it is a factory S14 T28. How it made 215 rwkw is a bit of a mystery, but then the whole setup is strange.

wp-image-697321557jpg.jpg

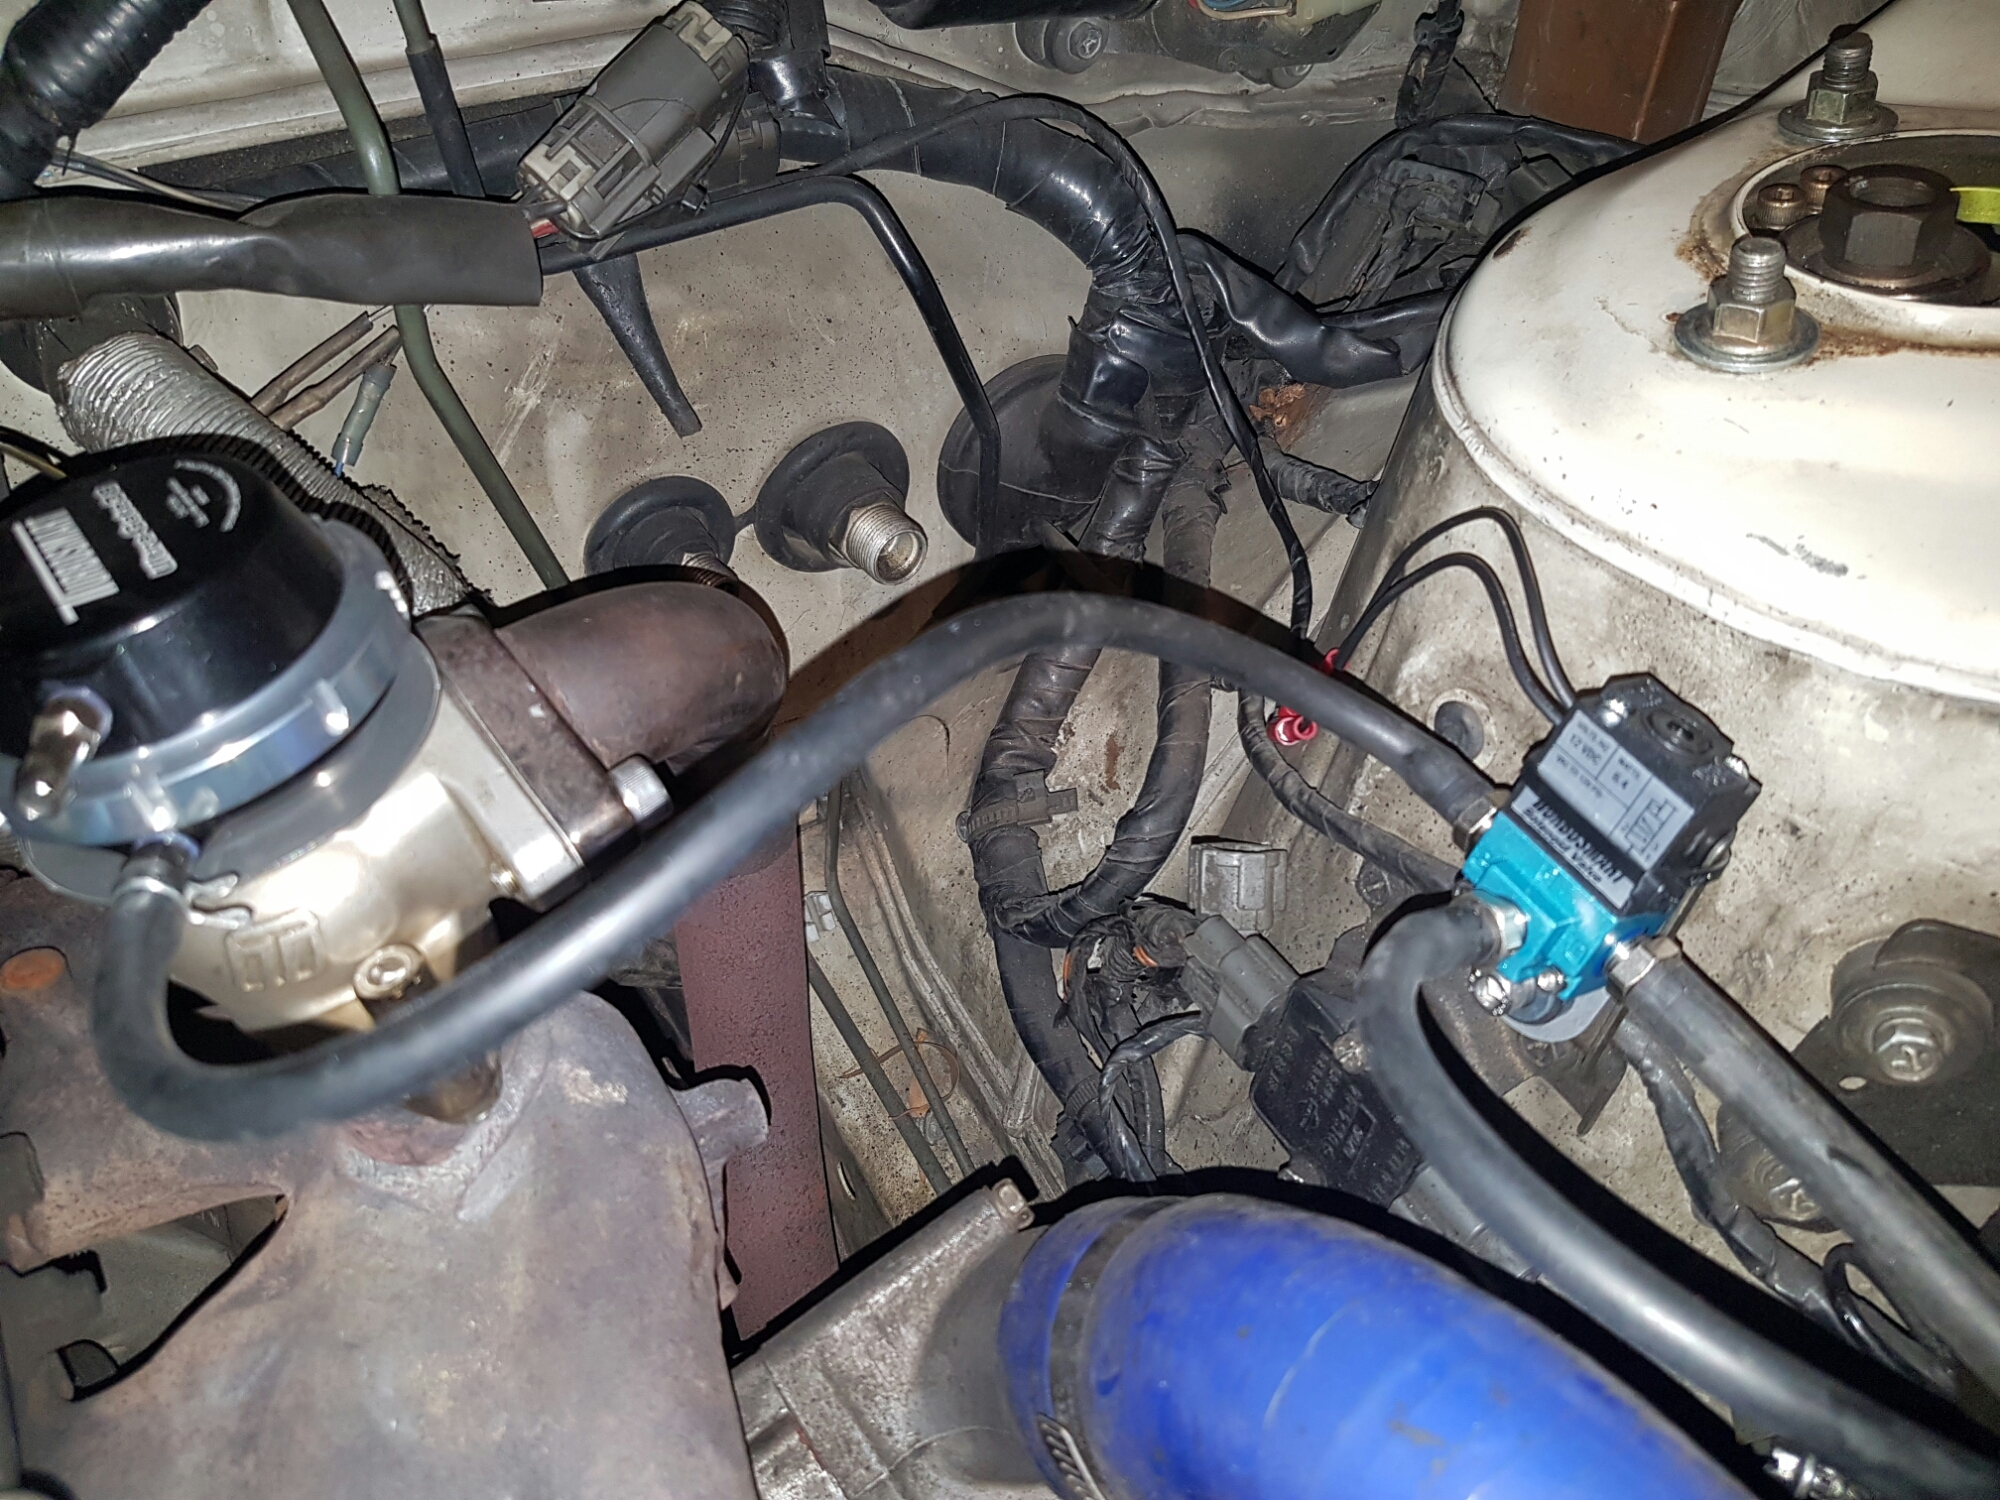
The turbo has braided oil and water lines, and the factory internal wastegate is sealed up with an external wastegate fitting welded onto the factory cast iron manifold. The wastegate looks to be a cheap eBay item, in the style of a 38mm Tial. Perhaps the turbo is high flowed? I doubt I’ll ever know the answer.

20160802_205956.jpg

The turbo does have a lot of play from front to back, but none from side to side. The oil in the compressor inlet concerned me at first but Dave reminded me that the oil breather attaches to the inlet just before the turbo.

There is evidence of a small exhaust leak on one of the wastegate flanges. This weekend I’ll get it back together. I don’t have new gaskets, so I’ll use exhaust sealant in the meantime as a bandaid fix.

In future, I think I’ll go back to the type of setup I had on the grey 180. This means ditching the external wastegate and changing to a stainless steel equal length runner manifold, with new dump pipe to suit. I have such fond memories of the HKS 2510. I don’t believe they are available new so maybe a HKS GT-SS would provide a similar experience. Another popular choice is the Garrett GT2860RS or ‘disco potato’. It depends on what comes up down the track when I’m shopping.

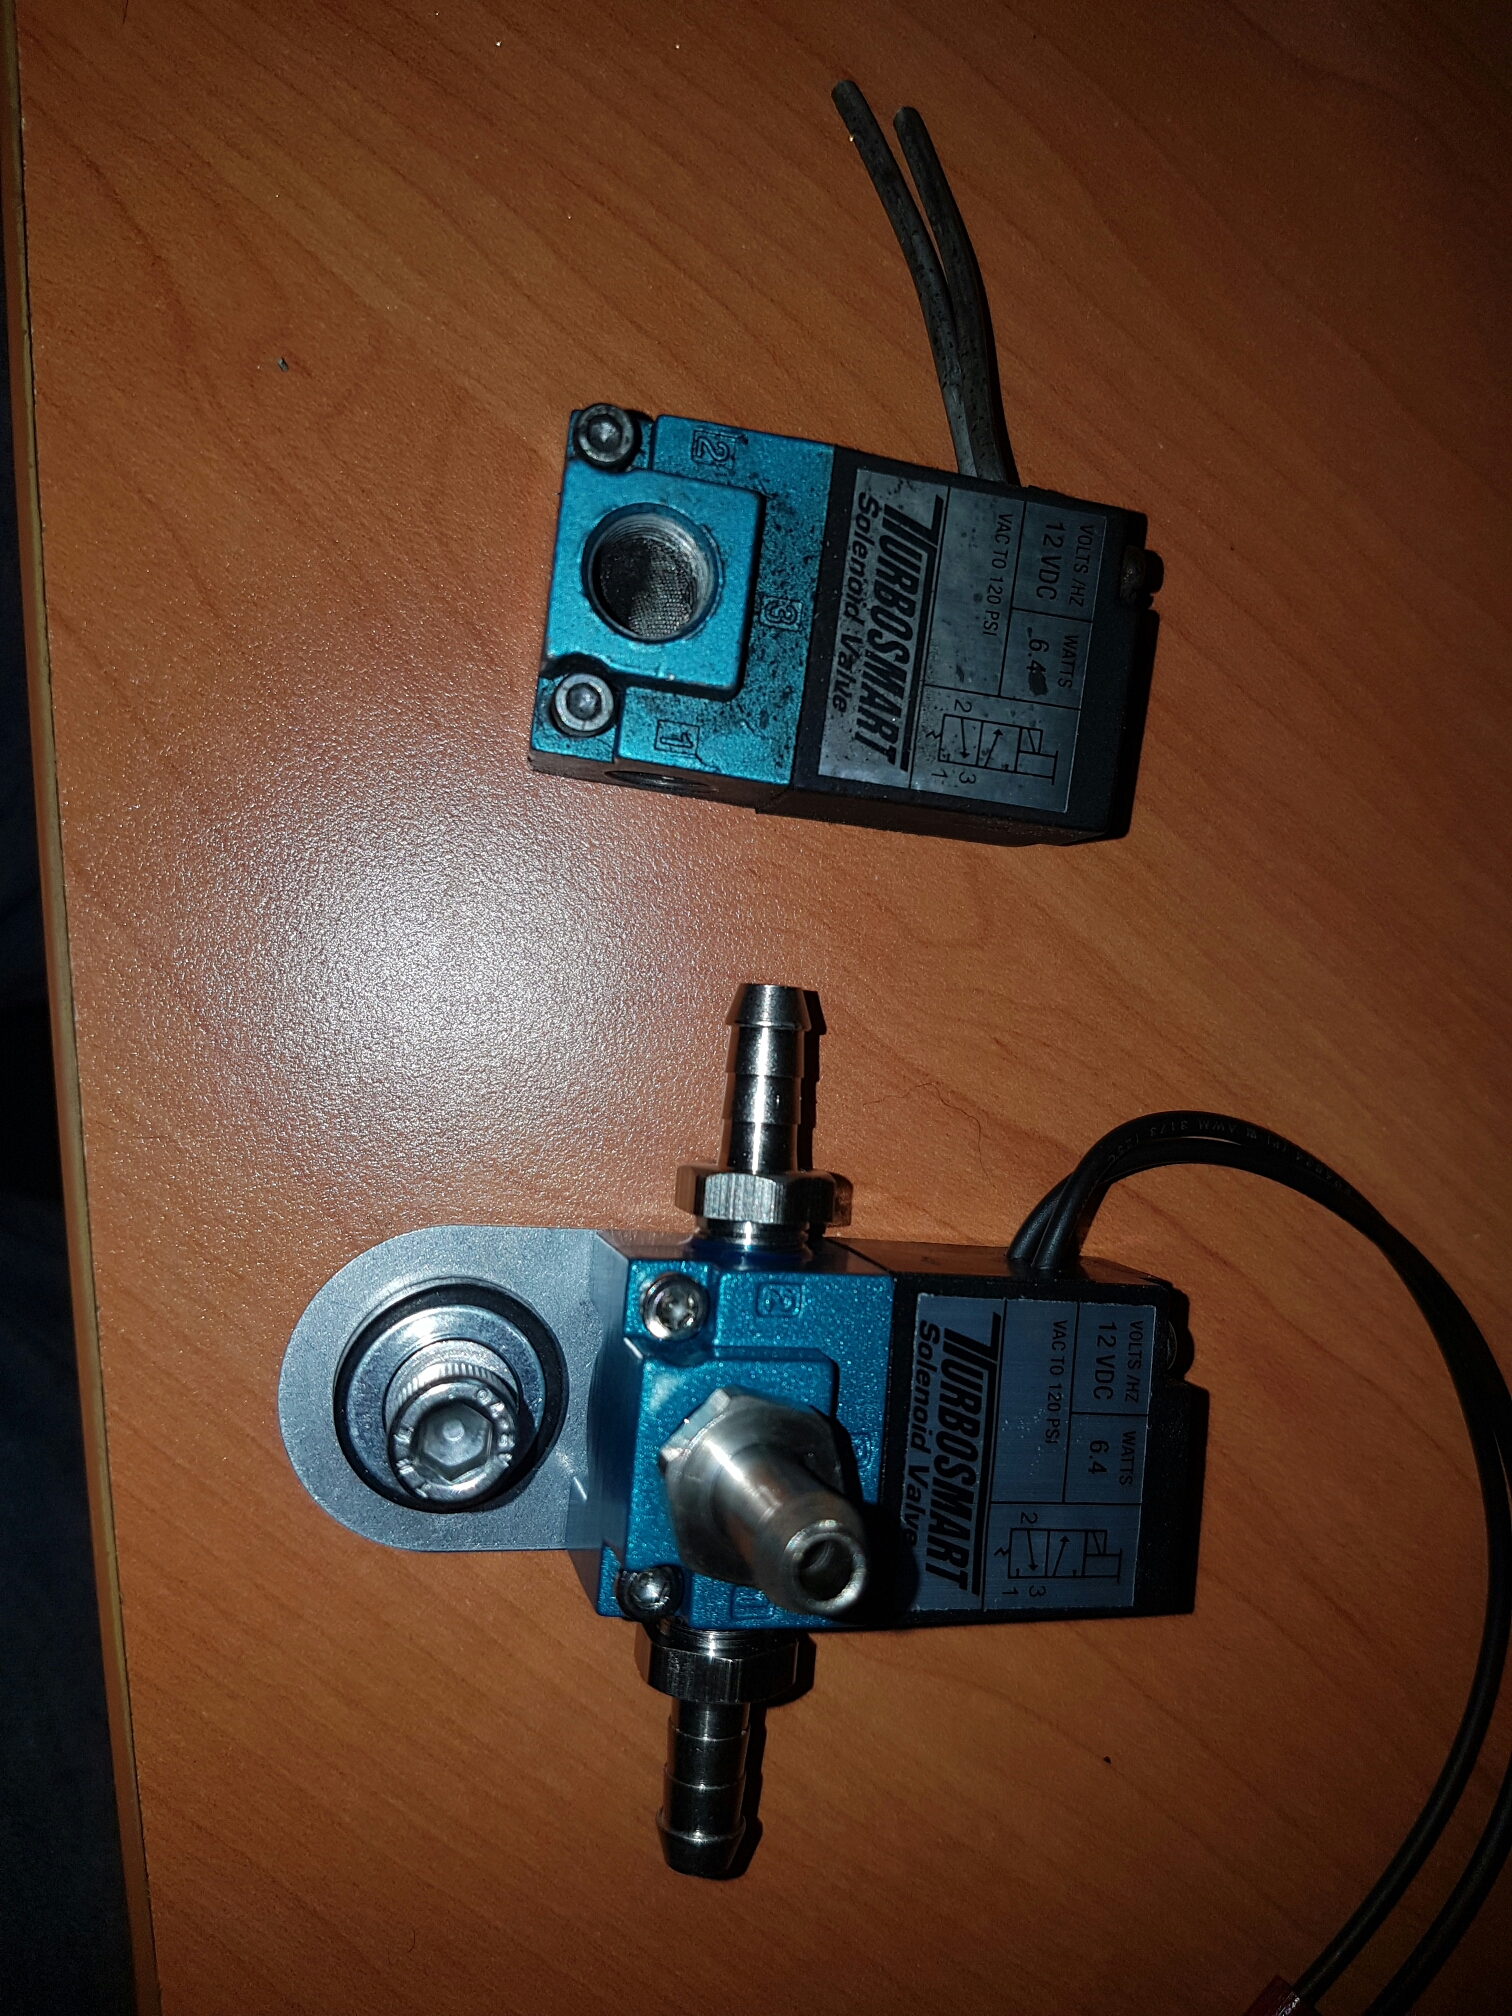
The reason I pulled everything apart was to check for leaks or a faulty wastegate. With VTC enabled the car picked up little improvement in spooling speed. The real conundrum was trying to connect the electronic boost controller that came on the car. Without it, the spring in the wastegate delivers a very stable 15 psi. As soon as I connect it up as the manual suggests, the wastegate fails to open and the engine hits 20 psi before I back off. The solenoid is connected and allows air through like it should. When it is all back together, I’ll connect it using two ports and see if that fixes the problem.


The last week has seen some good progress with the Sileighty. Parts that I have ordered have trickled in, with only the R33 front calipers still to come. I have a large area of carpet in the house covered with parts ready to go.

Furthermore, I have been collecting the necessary tools and equipment ready for the installs. This includes things like loctite, strong tape and extra dremel cutting discs ready to prepare the braided lines for the oil cooler. I have replaced a broken ratchet drive and purchased a wheeled trolley for working under the car.

Perhaps the greatest progress this week was finally getting the factory VTC system working. This involved pouring through service manuals to find pinouts, loom maps and diagnostics. I eventually found out that the ignition switched 12V that needs to go to the F4 plug from the S14 SR20DET loom had not been connected. This meant that both the VTC solenoid and heated O2 sensor were not getting power. I will make a new page regarding S14 SR20DET into S13 chassis with all that I’ve learned.

After many late nights, unfortunately, the car is not much faster. There is a bit better low end response but ultimately I think the tune is rubbish. ECU inspection revealed the car was previously tuned at Envy Dyno, who have a terrible reputation online. If they were the ones who did the engine install and wiring loom then I know that they are quite sloppy.

The last tid bit is the installation of a better alarm with keyless entry. My daily driver can be entered and started without taking the key out of my pocket so it’s really nice to have this modern and convenient feature.

The new Mechanical LSD Differentials page is now up. I hope it is as informative and educational as the pages I produced ten years ago.

Most of the new brake parts have arrived. Just waiting on the 2nd hand R33 Gtst calipers and new pads all round.

I have a license for the Nistune software and a consult to USB cable on the way. Soon I can plug in my laptop and see what the ECU is doing in real time. Hopefully then the non working VTC can be diagnosed and rectified, giving the car some much needed low/mid range torque. Connecting the electronic boost controller after this will then add even more.

Sunday was a productive day. The KAAZ 1.5 way diff was successfully installed and boy is it aggressive. The smallest hint of throttle locks the rear, which as low revs/speed gives a lot of skipping. Under power it is going to be awesome but for the street it’s a bit too aggressive. I will experiment with adding friction modifier to the diff oil to tone it down a bit.

There will be an aftermarket diff page shortly with pics of the install and an identification guide.

It was strange and exciting working on cars again after so long. Some time was needed before I found some sort of efficiency. Changing the diff is a fairly straightforward job. Pulling it out was smooth, and putting it back in was rapid  due to the purchase of some pivoting head ratchet spanners. The fancy neck allows them to swing out of the way of any conflicting components. In this case, the swaybar and exhaust. Along with a breaker bar and decent set of sockets, this is highly recommended.

DSC_0505