Ever seen those Cusco handbrake buttons and wondered what they were for? Also ever wondered how some Japanese drift cars are able to engage the handbrake on the run to get the car sideways before the bend without it locking on and the car spinning away out of control? This article explains all about converting your handbrake to drift spec.
Stopping the Handbrake from Locking on when Engaged
This is the most simple part of the whole exercise. The first thing you have to do is slide off the plastic over the handbrake to expose the metal mechanism beneath. Near the top underneath the plastic button will be a small spring. Remove this however you like, it is no longer needed. Finished.
But now how do I Park?
You will notice that the handbrake can be raised merrily without the ratchet mechanism causing it to stay on, fine for drifting, but what about when you want to park and have the car not roll away? To do this the button must be pulled up manually before lifting the handbrake, and then the ratchet will catch and hold the lever up, safe to leave the car parked.
Aftermarket Handbrake Buttons
The problem now is that with the tiny plastic factory handbrake button recedes inside the plastic outer cover, and is extremely difficult to get at when you want to park the car. Hence aftermarket handbrake buttons, which sit proud of the cover and are wider so they can be pulled up easily when the vehicle is to be parked. Note that to the best of my knowledge buttons such as the Cusco simply fit over the top of the factory plastic button, and hence would do nothing functional unless the spring is removed first. These cost anywhere from $30 to $60, and look great, but are a little too steep for a simple piece of metal for my liking.
Making your Own
Having access to a lathe and scrap billet aluminium in the uni workshop I wanted to attempt to make my own button. My first attempt had a very nice finish and was designed to screw into the top of the factory plastic button. Do do this a sharp blade must first be used to slice off the top of the button, which leaves a hollow cavity. However I made the threaded section too wide, and when impatiently trying to force the button one I destroyed the surface of the button and the factory plastic button underneath.
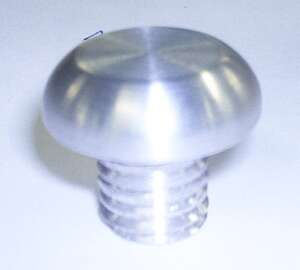
The next day I took in more components to make sure everything worked. Firstly I made another button, this time with a smaller thread and very similar in shape to the first unit. Next I made an adapter sleeve to attach the button to the metal rod inside the handbrake. The inside of this was threaded as well as the outside of the metal rod (M5 x 0.8 is perfect) so they everything could screw onto each other and therefore come apart easily in the future.
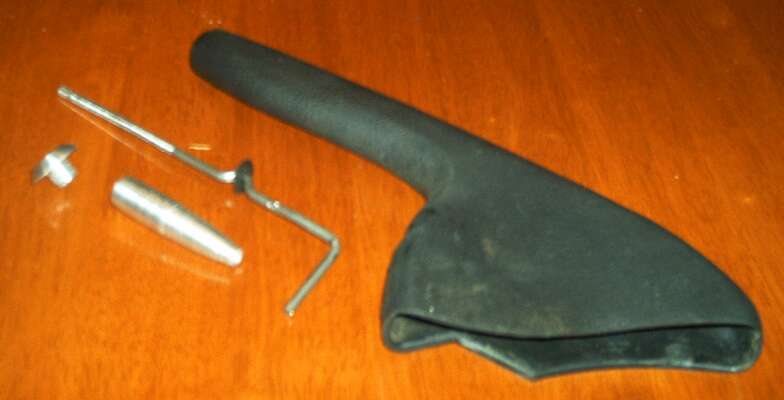
The advantage of threading the metal rod was that the length of the sleeve was unimportant, as it could be cut down and the sleeve still screw on until the perfect button position is found. The picture immediately above shows the parts assembled after the metal rod has been shortened.
The Finished Result
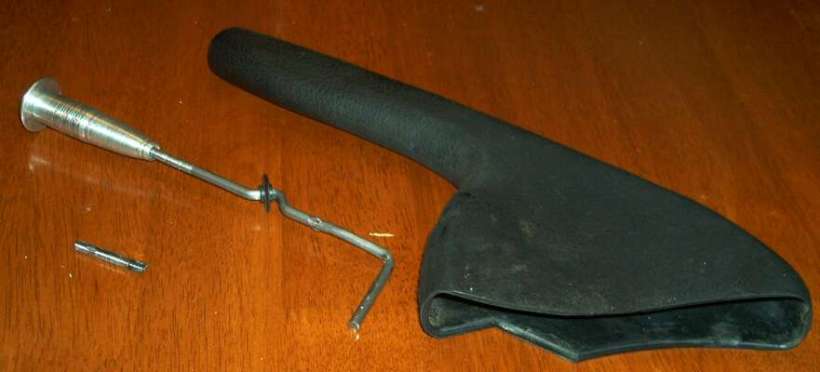
The photos below made the button look a little rough but in the flesh it has a high quality finish, typical of machined billet aluminum. The added mass of the connecting sleeve underneath gives a very solid and high quality feel, and the handbrake works properly for both drifting and parking. A nice little mod that cost me nothing. Happy drifting!


