The next step in the modification after the exhaust was a large front mounted intercooler. While not adding power by itself the support that a larger core gives to later power production and reliability is well understood. For the first dyno run it undertook, the 180sx was exposed to a very hot day. Inside the building where the dyno was situated, the air was also quite humid and hot. The dyno operators at Unigroup told that the car was experiencing slight detonation. In actual fact, a full power run was never completed, so the car might have had a few extra kilowatts up top with a full run. Afterwards, touching the intercooler told the story, it was very heat soaked, the most it had ever been. Even after a late night mountain pass run which had the turbo glowing, the intercooler had not been that hot to touch. I had always planned to get a large front mount intercooler to run more boost safely, but now I knew it was justified even more a car with no artificially added boost. I pity those that boost up their cars without any other mods, I imagine detonation will catch up with them after not too long.
The Intercooler
I had bought the front bar with a massive cooler in mind so that is what I wanted. Using an unmodified front bar only allows about 210mm of core height to be used, but I was now able to expose around 300mm. The intercooler I purchased was a brand new Sparco tube and fin core in 600x300x73mm with cast HKS end tanks. It promised to have good properties in both cooling and flow. The core is available through Revrite Performance for $980. As can be seen in the pictures, the quality of the cooler in quite high. The internals are a very clean extruded pattern, which will allow a large internal volume for airflow. Also enhancing airflow is the nicely shaped end tanks. Many intercoolers have little end tank volume and the inlets point at only the bottom of the core. These are angled towards the middle and curve out nicely. Basic airflow principles tell that that air distribution would be excellent. Therefore on paper, the cooler looks the goods.
 |
 |
Trial Fitment
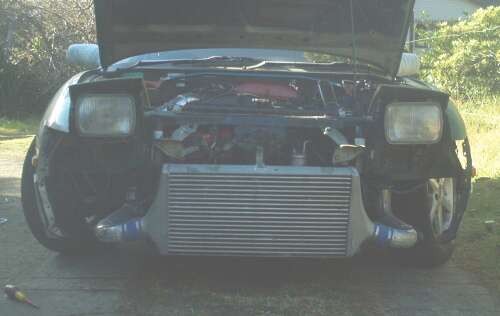
The front bar was removed and an optimum place decided for the cooler by lining up the the opening in the front bar. The bottom of the core was angled in slightly to match the structure of the front of the car, and to place the most vulnerable part further away from where any minor impacts may occur in the future. The trial fitment suggests that the cooler will be very dominating in the front of the car and look fantastic to boot.
 |
 |
Professional Fitment
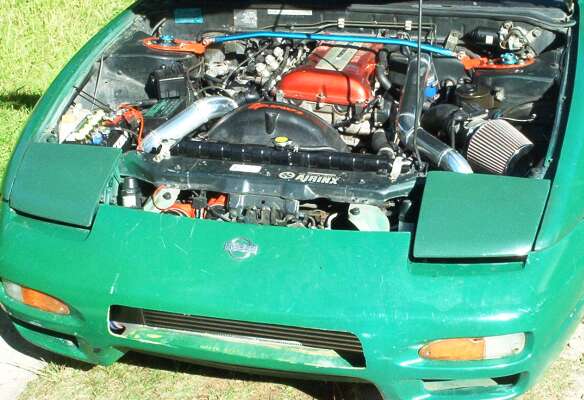
The first step was for me to find a smaller battery to make way for the engine bay pipe work. The old battery used the entire area available in that corner of the bay, deeming it unsuitable. A cheap replacement was found at Kmart with a EXIDE maintenance free battery for $65. Care was taken to ensure a unit was purchased with the terminals on the correct side of the battery, not doing this is a easy mistake to make. Despite being about half the size and weight of the old battery, the EXIDE seems much stronger in starting the car, so far providing fuss free service.

Hills Motorsport fitted and plumbed the intercooler properly using mandrel bent aluminium piping with silicone joining hoses. Unfortunately, I was unable to reuse the factory Blow Off Valve as planned due to limited funds. As can be seen in the picture below the piping goes the entire way from the turbo outlet to the cooler to the throttle body. The piping is of a fairly high standard, the only complaint being that one outlet pipe from the turbo is a little too high and fouls on the underside trim of the bonnet. I will fiddle with this in the near future as the meeting point is starting to wear both touching surfaces.
Where the piping makes its journey out of the engine and into the back of the front bumper clean holes have been cut and plastic conduit placed over the perimeter of the hole to protect the piping. This looks quite professional and seems to work quite well.
 |
 |
Looking down at the gap between the radiator area and the intercooler shows the thickness of the core, and its placement. There is a small gap here to serves to allow a little movement before collision to protect the components.
 |
 |
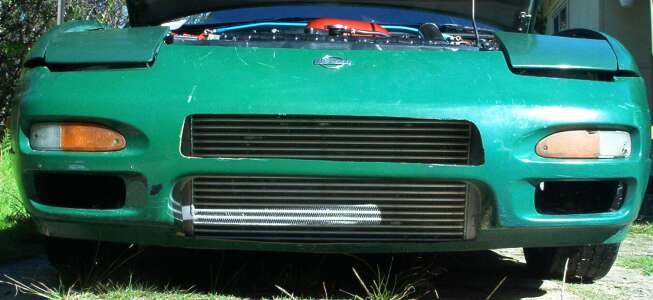
I switched back to the factory front bar as the aftermarket one did not really line up with the core, the bottom was hanging out unprotected, not good at all. Using an angle grinder I opened up the top hole (non factory – cut out by the Japanese owner), to allow sufficient airflow to the core. I did not want to go to the expense of a large front mount intercooler if half of it was to be covered.
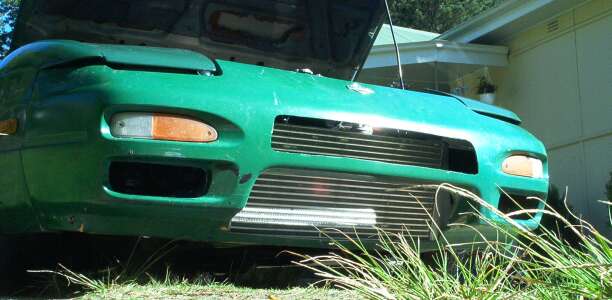
As can be see the bottom of the core is protected by the bumper, therefore any bottoming out will scratch the bumper and not the cooler, which gives me great peace of mind. There is still an inch or so that is above the opening in the front bar, but the swirling turbulent air entering while driving would ensure that this part of the core is not wasted.
Driving Impressions
I was expecting to have several negative side effects from installing the larger intercooler and no BOV. Many stated that the core and piping diameter was too large, although I disagreed thinking that it is not possible to have an intercooler too big within reason. Luckily for my pride, I seem to have been proven correct, as the car is driving exactly as it was previously. There is no additional lag, either from the cooler or in between gear changes from the lack of BOV. If it weren’t for the cool fluttering sound when immediately off throttle, it would be hard to tell anything was changed.
Another thing I was told was that I would lose a lot of boost because of the pressure drop across the core. This seemed totally illogical as small and restrictive coolers are proven to prevent the full boost pressure seen at the compressor outlet from reaching the throttle body. Surely fitting a larger cooler would pick up boost if anything, but this largely depends on where the feed for the wategate actuator line is. The only likely thing was that since the same mass of air was now spread across a larger volume this would cause the boost gauge to read lower, although the amount of charge air was largely unchanged.
At first I thought that I had lost a little boost, with it dropping back to the levels seen before the dump pipe. But after closely watching the gauge it seems that the boost gauge reading is simply more sensitive to the ambient temperature of the day. On a hot day, slightly less boost is shown where as on a cold night the boosting spike can reach over 0.8 bar like it did previously. This is a common event on turbo cars, but one I had not really previously experienced with this car. The only thing to really change directly with a temperature increase or decrease was throttle response.
Potential Power
Please note that at this stage there is no artificial boost control on the car. The pressure produced from the turbo is solely dependant on the factory setup and is currently holding 0.7 bar through the gears with the current modifications. In the future I plan to boost up the car with a special bleed valve to around 0.95-1.0 bar (~14psi). This will be performed on the dyno to safely monitor fuel mixtures and detonation, and to see the effect of raising the shaft speed of the turbo has on its efficiency. By graphing a range of different boost pressures, it should be clear when the turbo is running out of efficiency and is at the safe limit of its capacity. my aim is for around 150kw @ rear wheels assuming no other problems are apparent at the time.
UPDATE – Snapped Support Tag
Recently I had noticed the upper tag that holds up the intercooler had snapped, causing the core to sag down against the front bar and pull on the piping.

I removed the front bar of the car and drove over to the local industrial area to find someone to reweld the tag. I found an engine builder who performed the task for $10. The only problem was I wanted a triangular rib welded on the to strengthen the bend but he had no scrap material available. Can’t complain for $10 though.

