One of the easiest and the cheapest (free!) ways of improving all round performance of a car is to make it lighter. Less mass means better acceleration, improved cornering, and enhanced braking. Another benefit is a decrease in fuel consumption, as less throttle will be required in a given situation to maintain a constant speed. Any car can have components stripped out to increase performance, but it is important to make sure that nothing is removed that will affect the safety of the vehicle.
Anything that is removed will be a compromise in some area, as the factory puts it there for a reason. How much you can take out depends on your tolerance to lesser refinement and greater NVH, a common trade off. A good start is to clean all junk and rubbish out of the car, a few hidden kilos can often be found here. after this, the items I removed are as follows:
Rear speakers
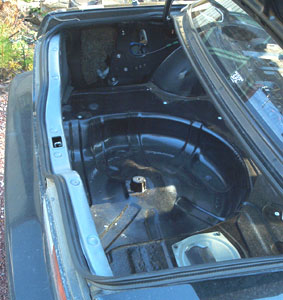
This area will vary from car to car, whether it be factory equipment or an aftermarket installation. In my case a very dodgy home made sub box with amplifier sat in the boot. The speakers were 8 inch and were pulled from old home speakers, the amp a $50 cheapie and the box constructed from an old table. The sound was about as good as could be expected – not very.
This was the item that kick started the whole process for myself, with the sound system components collectively coming in at approximately 20kg. Of course this vary from vehicle to vehicle, factory equipment may not be any where near this much. It is common to read of street cars that have professional installations weighing hundreds of kilograms, I can only imagine how detrimental this would be on the performance of the car.
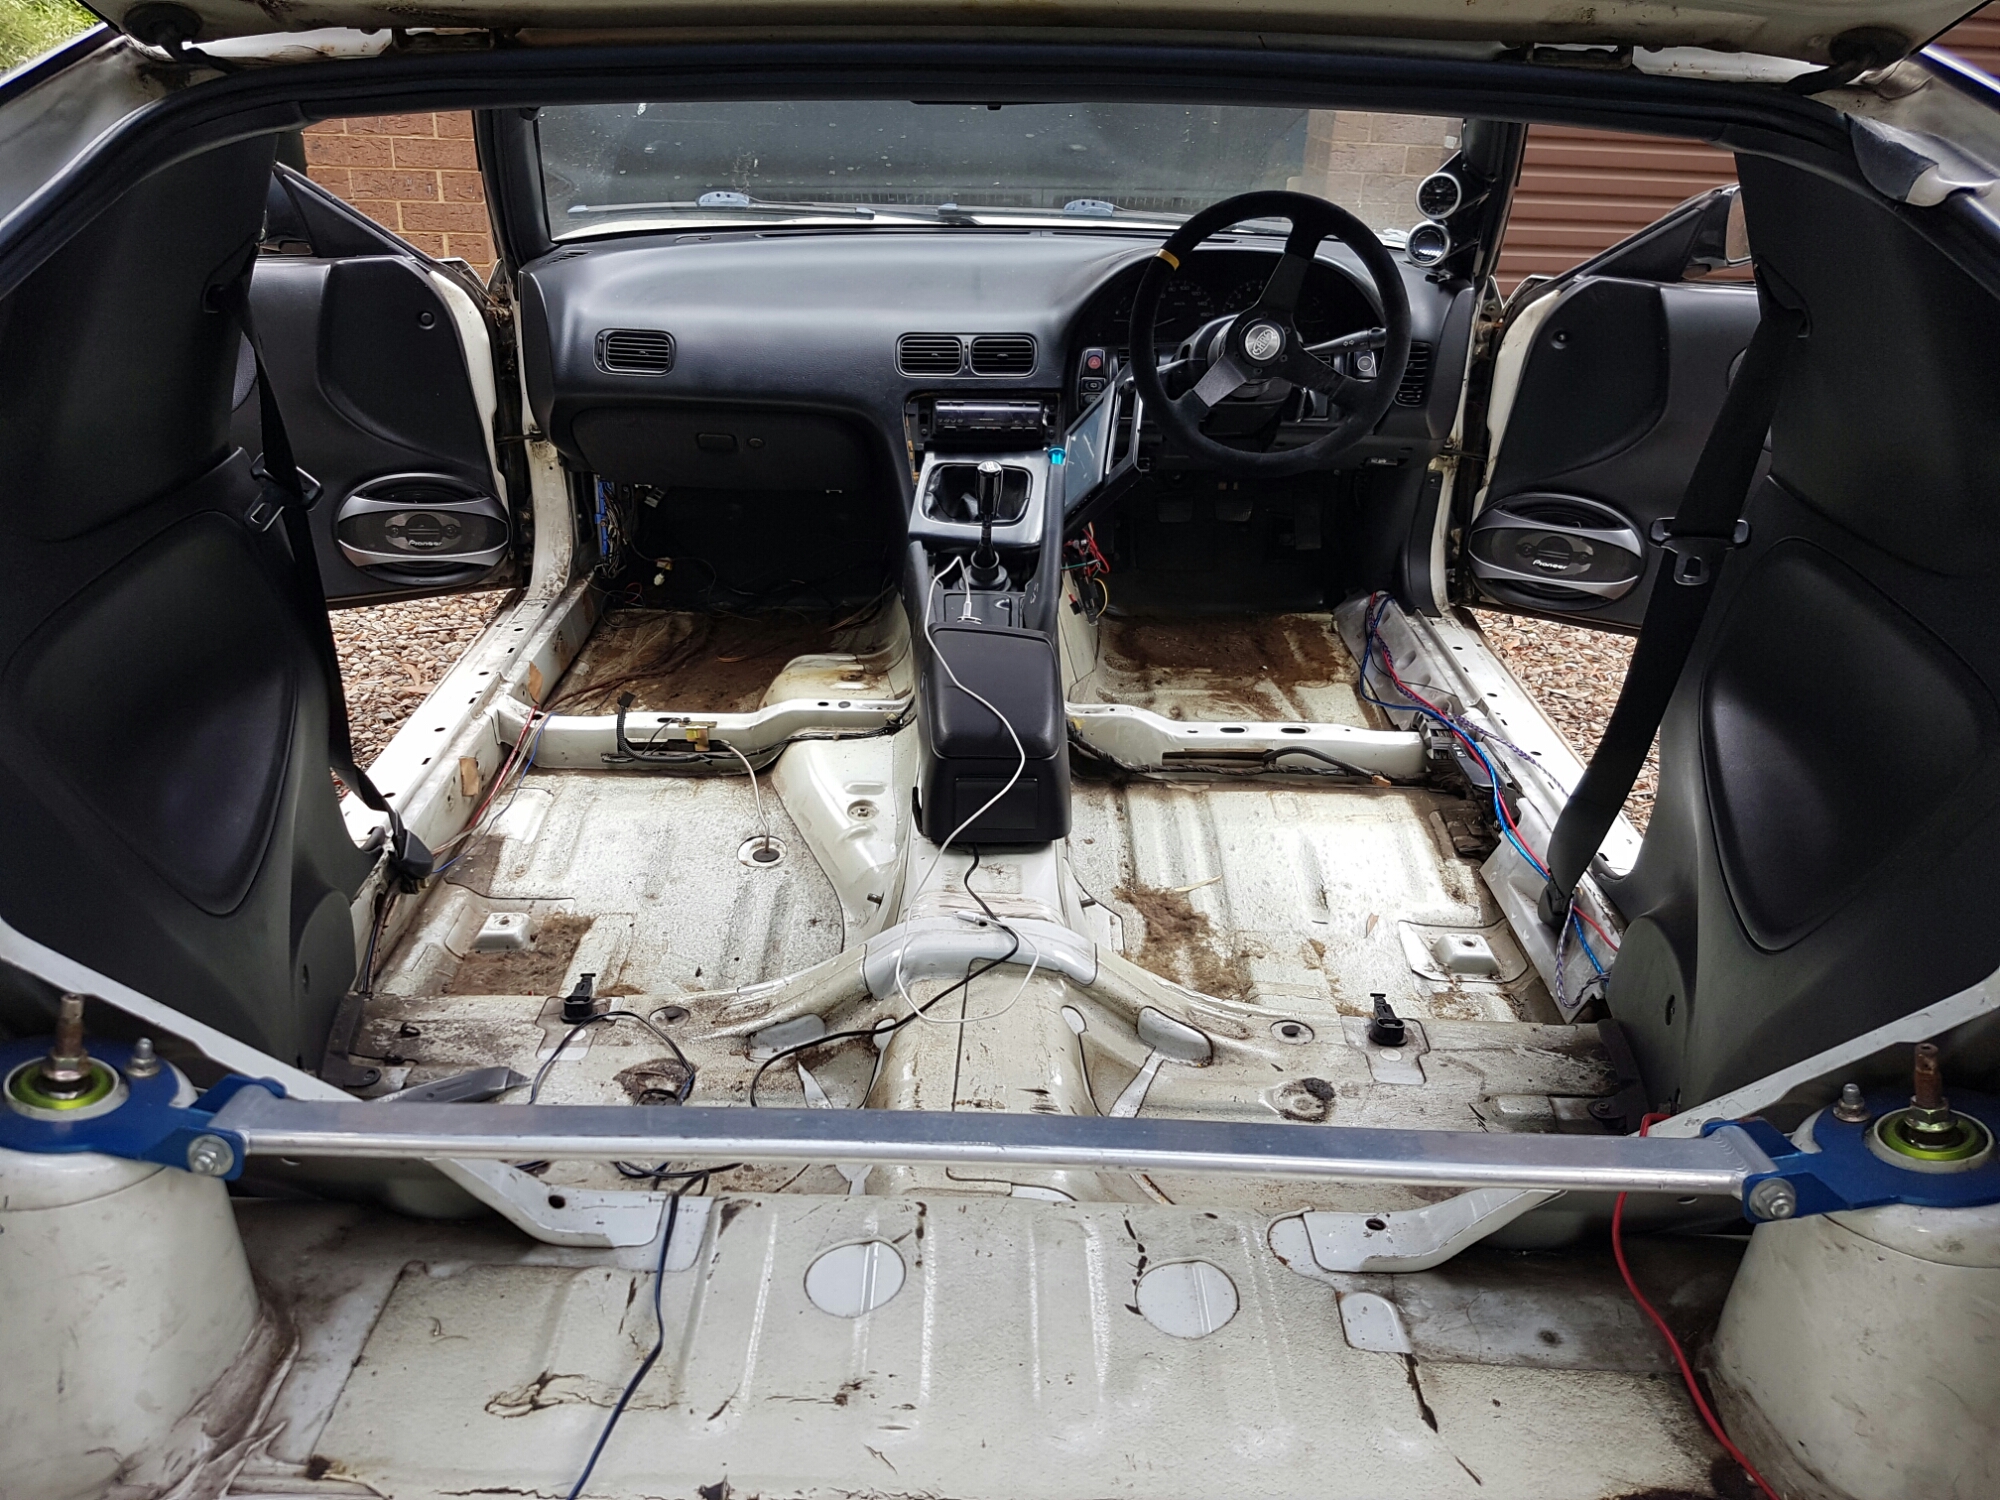
Rear Seats
Only some people would be in the situation to be able to remove seating from their cars. For myself, living with my partner and rarely needing to be giving lifts to people, I was able to consider. Fortunately, the seats are extremely easy to remove and give a worthy improvement. On a Silvia, the bottom section of the seat simply unclips and pulls out with a minimum of fuss. The upper section needs to be rotated forward to expose two bolts on either side. Once removed, the top section of the seat comes straight out.
I chose to retain the factory seat belts and child anchorage points mainly for legalities. I am unsure of the rules for this so it is best to leave them in. These mechanisms are highly engineered safety devices as well, and I did not wish to tamper with them in any way. I would stress this to anyone that is considering the removal of such items.
The approximate weight of the components are 4 kg for the lower part of the seat, and 9 kg for the back rest section. This give a total of 13 kg, not too shabby at all.


Trim and Carpet
Next, lots of other small components were removed, such as all of the plastic trim in the boot, the boot carpet, and the rear parcel shell cover. These are all held on by plastic clips, so make sure you keep them all in one place. A clear plastic container is preferable, as it won’t break if dropped and scatter parts everywhere. To be really careful you could put all of the clips and bolts into clear plastic bags labelled for easy identification.
Although individually these small parts are light and seemingly insignificant, but one must remember that with this process every little bit counts. To prove this, the pieces of trim add up to around 4 kg.

Spare Wheel and Tools
Be very careful with this, if you live in an area with roads of dubious quality, then perhaps this is not for you. I removed the spare wheel on the premise that where I live there is a service station every few kilometres and that I have family who could (disgruntledly) drive me the spare if needed. Products are available that spray onto the damaged tyre to allow enough function to drive to the nearest help. Perhaps ths could be an interesting option.
Although the spare is only a space saver and very skinny, it is made of steel compared to the aluminium alloy found in the proper wheels, so it is still quite heavy. The spare wheel in the Silvia weighed in at 12 kg, quite obese indeed. The increased boot space is handy too.
If no spare tyre is on board, then their is no point carrying wheel changing tools. The factory jack and a associated wheel brace came in at around 5 kg, very worthwhile. Additional advantages are no more loose objects clanging and rattling around the car.
Rear spoiler
Most factory rear spoilers are simply cosmetic in that they provide next to no downforce. Another purpose for a rear spoiler is to break up the airflow over the vehicle as it detaches from the body, which can change the co-efficient drag significantly. If you are worried about this, then trial the modification at high speed on a freeway. If the car feels noticeably light or unstable, then place the rear spoiler back on the car immediately. For the Silvia, no difference was found. Removing the spoiler is as simple as four bolts on the underside of the boot lid and unplugging a wiring connection. The spoiler has a mass of 4 kg, which is quite useful.
A problem arises in the holes left in the boot lid, which can be either covered or ignored. The menace that is rust will mean that you should protect the boot lid from the elements. I choose to use matching colour tape, on both sides of the panel to seal it from moisture. Others have found the correct diameter rubber plugs, which is a more professional looking solution. The ultimate would to have the boot resprayed and sealed by a professional, but this would not allow the spoiler to be reattached without drilling new holes in the boot. Below is an image of my boot holes taped, the tape has not perished after several months and should last several more.

Final Results
Here are the results of the entire process:
| Item | Weight (kg) | Cumulative Weight (kg) |
| Rear speakers, amplifier and speaker box | 20 | 20 |
| Bottom of rear seat | 4 | 24 |
| Top of rear seat | 9 | 33 |
| Trim and carpet | 4 | 37 |
| Spare wheel | 12 | 49 |
| Tools | 5 | 54 |
| Rear Spoiler | 4 | 58 |
| Total | 58 kg |
Just under 60kg is an excellent loss in weight, and was noticeable immediately. It is the equivalent of an average sized passenger, or more than a full tank of fuel. The car felt brisk and nimble, a little bit better in every department.
The negative results were a huge increase in exhaust noise from the cabin, and a slight loss heat insulation. I am enthusiastic enough though that I don’t really mind this. I especially like the look of the car without the rear spoiler, it matches the stripped interior for a ‘anti-rice’ style aesthetic. It gives the car a tough look, which I love.
Main Carpet
On the grey 180 and the white Sileighty, I went further by removing the main carpet. If you intend to pull it out in one piece, then be prepared for an ordeal, as the dash must come out first. If you are prepared to cut the carpet to get it out, then it can be done quickly.
At a minimum you will have to remove the seats and the plastic trims along the door jam and kick panels. Cutting the carpet under the dash to the gear shifter will have it out quickly.
Be prepared for an increase in road noise and some ugly, exposed wiring. The carpet and padding underneath adds up to about 7 kg.
Going Further
Stripping components can go as far as you want when not considering roadworthiness. An off street drag car may remove structural components that are necessary for road use, and would be dangerous to drive on the street. To keep it legal on the street you can still do plenty more than what is listed above, but just remember that the car will drive differently after every stage, for better or worse.
Possible further steps include:
Air conditioning equipment, all interior trims, passenger seat removal or replacement lightweight seats, and sections of dashboards. No matter how far you go, I recommend this process to the extent that you can handle.
