No posts but it’s still been a big week working on the car, just not in the garage. I have been developing the centre console multi gauge LCD screen and it is nearing completion. It currently reads multiple sensors, transmits a wireless string with their data to another microcontroller which interprets the string and runs a 4D Systems LCD. All that remains is the final wiring before it’s mounted in the car.


I’m writing this from MRC Dyno in Castle Hill. Tuning is underway and going well. The intercooler piping I had to cut that didn’t have a bead predictably blew off as we started winding in boost. Mark let me pull it off the car and use his bead roller to rectify the problem. Tuning will resume again soon.

So far the car has made 199 rwkw at low boost after only fine tuning K constants and the TIM to get the light load mixtures correct. Despite the wastegate being set to 14.7psi, it can’t clear enough exhaust gas and the car is actually making around 17 psi up top. This won’t be a problem when the boost is wound up as the wastegate won’t need as much flow.

A full report with results later on today.

Finally I’ve finished working on the car and I have to say I’m pretty over it. The last few weeks have seen many hours put into the Sileighty and many modifications made:

  • Kinugawa TD05-18G turbocharger fitted
  • Dump pipe modified
  • Fitment of rocker arm stoppers
  • Fitment of oil cooler and remote filter plate
  • Fitment of winged sump
  • Fitment of new boost gauge and Innovate MTX-L wideband 02 gauge in new pillar pod
  • Fitment and wiring of Z32 MAF
  • Repair wiring of Varex muffler
  • New coolant, oil, oil filter, fuel filter and spark plugs
  • Fitment of GKTech radiator fan
  • Fitment of GKTech coolant elbow spacer
  • A lot of experimentation and data logging with Nistune

As the list mentions I fitted my new boost gauge this afternoon. I changed the black bezel to silver on the 02 gauge to match:

wp-1481613173755.jpg

A 12V headlight power source was finally added to dim the 02 gauge and illuminate the boost gauge. Most of the day was spent grinding the Greddy copy winged sump to fit the bottom of the engine. I’m not sure whether having an S14 motor or this sump having a poor casting was responsible, but this problem did not present in the past on the grey 180sx. Two new pages have been created: oil cooler and winged sump. Use them as a guide to learn from my experiences and mistakes.

The car has been booked at MRC in Castle Hill for tuning next Monday, with $800 quoted. This includes flashing the Nistune daughterboard to the newer feature pack spec which gives a worthwhile range of things to play with. Injector and MAF changes can be made without upsetting the K constant. More control of warm up and knocking is also available.

Up until this point I have always been loyal to Unigroup, but a few things have happened recently which has made me lose faith. The first time this car was put on the rollers, Mark was a little haphazard, ignoring Roland as he furiously waved his arms to signal detonation He assured me there was a blocked cat which was robbing power and making it ping, but this turned out not to be true. The turbo gaskets he gave me were also the wrong size.

I tried to book a follow up dyno session by an email which was never replied to.

Eventually, my next visit with Yavuz was excellent. I left very happy with my experience.

When I dropped in last week, Mark told me he could book the car in for a tune before Christmas on the spot. I told him I needed to discuss details and pricing with Yavuz before proceeding, and I would send an email that I would like him to tell Yavuz about. I waited half a week for a reply which told me I couldn’t be fit in until the end of January. Very frustrating.

There is growing concern on forums, which I share, about the direction Unigroup is heading. Yavuz is fantastic but is difficult to see. He seems to delegating much of the work to others. Mark has a perceived arrogance that doesn’t go down well. The disparity in information from Mark and Yavuz on available bookings is evidence of this or poor communication. Either way I’m letting my money do the talking and taking a punt on MRC. They seem to have glowing reviews on forums, with Mark said to give a lot of feedback on the tuning process. For me, this is ideal. I intend to sit in the passenger seat for the duration and learn as much as I can.

I’m currently most of the way through installing the oil cooler. It has been quite an involved and frustrating job. In particular, access to the factory oil filter block is very difficult. Removing the alternator was also a pain. The whole thing would have been easier if the inlet manifold was removed but that is a huge job in itself. At one stage the last bolt for the filter block was not going to budge so it almost came to that but thankfully didn’t. If anything leaks, I will be distraught because I’ve had enough of working on the car for a little while.

The good news is I have been documenting everything which will appear on a new page. A sump page will also be added at the same time.

Today the booking for the tuning of the car will also be finalised.

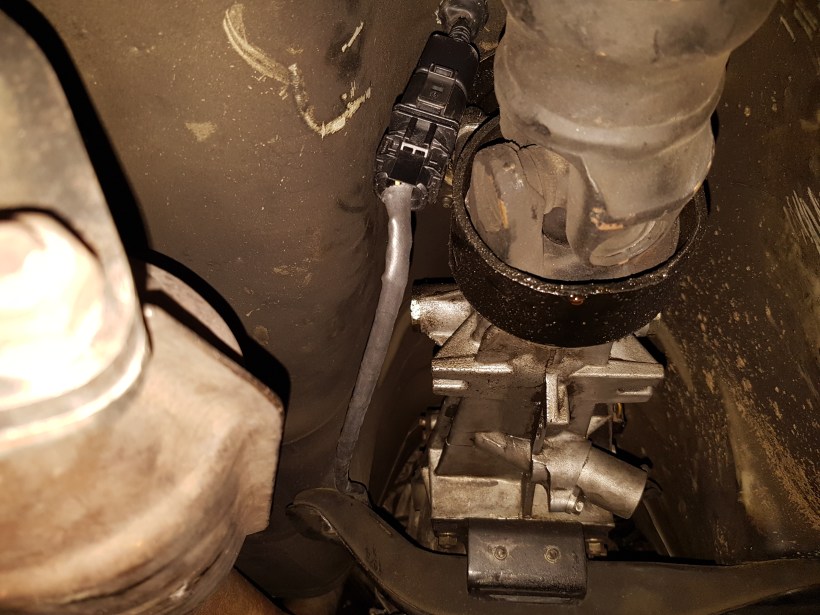
I have been relishing in spending some ‘quality time’ with the car. Since putting it back together the other day, I have been battling an intermittent misfire which makes it run on three cylinders (and sound like a WRX). I did idle the engine with the rocker cover on but not torqued before putting in the rocker arm stoppers which sprayed some oil mist into the spark plug wells. I thought it was this but remember a slight miss on the dyno for the final run. I cleaned the coil packs and put in new spark plugs but the problem would still come and go. Wiggling the coil pack harness while idling would often fix the problem, so yesterday I picked up a 2nd hand unit from SSS Automotive. When I first fitted it, the car still idled on three cylinders, but shortly after it went away and is yet to return.

Yesterday I pulled out an injector to try and verify it was a 740cc Nismo as the seller had listed. Googling the numbers on the body told me very little. The A46-Z00 code seems to match everyone’s injectors online, so I assume it is related to the plastic moulding for the injector which is shared across various models. The other ‘0122214’ number is likely a batch number, as everyone posting on forums had a different one regardless of their injector. Visually, the injector looked like most others. Googling Nismo 740cc injectors produced variations in colours from site to site, although most forums agree that Nismo 550cc injectors have a yellow body and the 740cc injectors have red. There is some confusion around the Jap spec S15 injectors looking similar but they appear to universally have a green portion near the nozzle. There was nothing to confirm that they weren’t 740cc injectors but it was still inconclusive.

wp-1481235701473.jpg

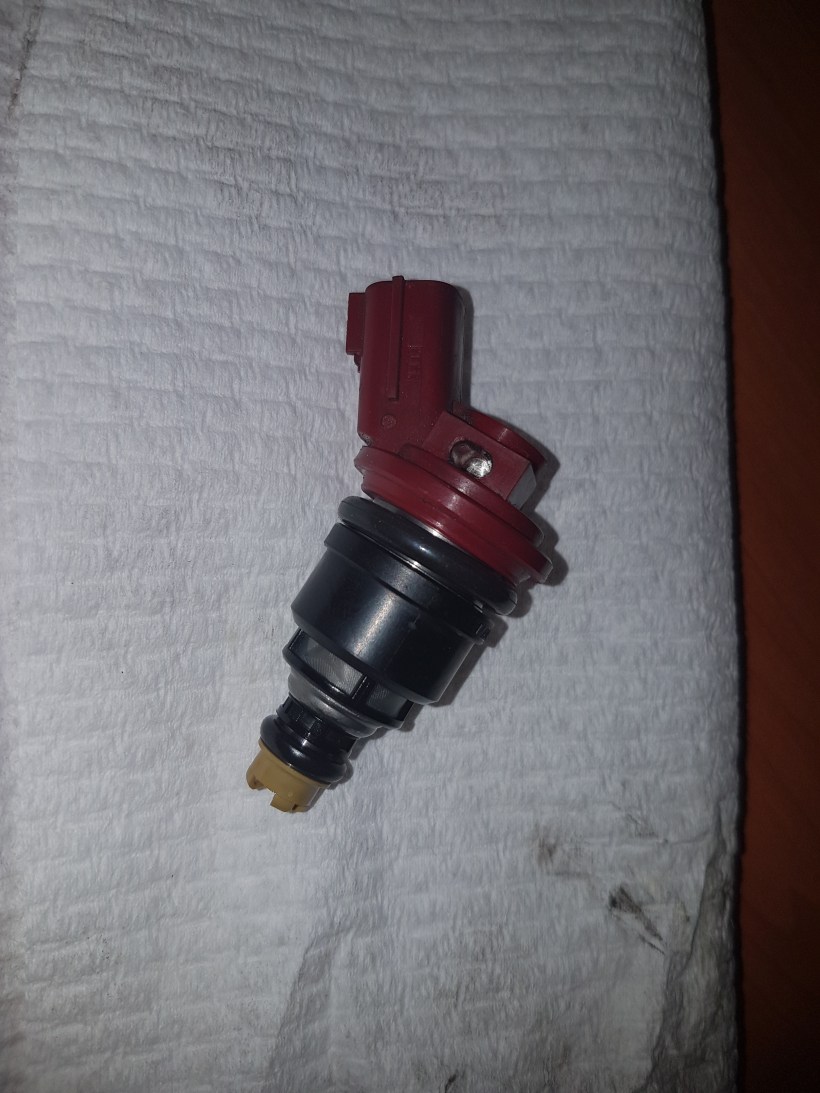
I turned to using the tune pulled off the ECU in Nistune as the indicator as to the real size. Starting with a bone stock map, I first altered the tune for an RB25 afm, then various sized injectors. Doing this changes the K constant, which is used to calculate load and fuelling. The RB25 afm/ 740cc combination was closest to the K value in the tune as received.

Another good way to test was to install the Z32 afm, tweak the settings for this and 740cc injectors and see if it would fire up and run. If the injectors were not that size, then the tune should see the engine struggling to run. Fortunately the car fired up and ran very well. I then copied over the fuelling and ignition timing maps from the previous tune, which are more conservative and suitable until the car is tuned. The car is driving at least as well as it ever has. The combo of Z32 afm and 740cc injectors puts the K constant very close to the original, which helps the ECU function as it should. The car no longer goes lean as it comes onto boost which is very encouraging.

The wiring for the RB25 air flow meter was quite butchered, with twist and tape butchery. I disassembled, soldered and crimped on some spade connectors. The Rb25 afm can now be swapped back and forth if the need arises.

I am in initial talks with Unigroup about booking in the tune, which I’m hoping to have done asap. A big thanks to my wife for giving me the blessing to proceed so quickly.

In the meantime I’m going to experiment with cutting and fitting the braided hose that came with the oil cooler kit. It arrived in one continuous piece, which is more customisable but more work. If it is simple, I’ll install it and the winged sump before the tune.

End of day update: The car is back together and driving. The rocker arm stoppers took longer than expected to install due to the required grinding of the rocker cover. All of this has been carefully explained and illustrated in the new Rocker Arm Stoppers page.

The car initially was only running on three cylinders. I think this was due to idling the car earlier on in the day with the rocker cover not tightened. Some oil blew past the inner gasket and onto the coil packs. When they were reinstalled, a dodgy connection ensued. After a wipe and some idling, the problem went away. I have new spark plugs ready to fit that should eliminate the problem completely.

I ventured out and turned off the electronic boost controller to keep the turbo on the 15 psi external wastegate spring pressure. Having the wide band 02 gauge was amazing! The car is untuned but at least I could see if a dangerous lean out was occurring. I didn’t give it much throttle but under load the air fuel ratio is an ideal 11.5-12:1.

The engine is a touch laggier than before which is to be expected with the larger turbo. On 15 psi it’s a bit slower than the car before the change. The bigger turbo will be able to pump more boost at with more efficiency and therefore cooler inlet temperatures. More timing can then be added hand the power should come. The midrange will improve with more boost, as the electronic boost controller can be tuned to aggressively minimise wastegate creep. The turbo sounds a lot smoother and quieter as it spools. In a way it sounds more precise, which I like.

I’m very relieved to have the car back to a driving state and running okay. Apart from wiring in the Z32 AFM plug in parallel for an instant changeover later on, the car is ready to be tuned. I have to get a quote from Unigroup and save some coin, as registration is due within a month. Hopefully all of the tidying I’ve done pays off in the rego check.

Half day report: The wide band 02 sensor and gauge are completely installed. The gauge pillar mount needed a bit more trimming to allow the wires and vacuum line to come out the bottom, and the wires for the wide band needed extending too. I powered everything off the audio circuit, since I won’t be using it for audio.

Calibrating the gauge was easy enough, and while I still had the car on the ATV lifts, the gasket was delivered. This means that everything underneath the car is tidied and finished.

I also managed to get the Varex exhaust going again, with what seemed to be a pinched wire shorting somewhere. A fresh fuse and it seems to be running perfectly.

This afternoon I’ll be installing the rocker arm stoppers, creating a new page to document their install and then driving the car for the first time with the new turbo.

With time on my hands I’m continuing to make steady progress. As of tonight, the new turbo is completely fitted. In the morning, I finished the assembly of the turbo by putting together the manifold, turbo and dump pipe with loctite and reusing the fold down nut holding tabs. The only drama was the fitment of the original oil drain, which needed some grinding to suit the narrower hole pattern.

The best news is that the new dump pipe modification lined up perfectly, minus the lower gasket, which hasn’t come yet due to a forgetful eBay seller. Everything that could be was degreased and cleaned as it went back on, such as the compressor snorkels. A key tchnique I have employed is making a list of everything taken off, including nut/bolt sizes and quantities. Everything gets crossed off as it goes back on which ensures no mishaps.

I took the time to install my GKTech larger engine fan and coolant elbow spacer. The latter has a threaded bung that will eventually have a coolant temp sensor fitted. All of the mating surfaces were cleaned before fresh silicone was applied. Finally I filled up the coolant, ready to start the car. With a new turbo, it is important to unplug the CAS and crank the engine for a while to pump oil into the new lines and turbo. After this I fired up the car and bled the coolant system.

This involves having the front end up higher than the rear, a snug fitting funnel in the top of the radiator and topping up the funnel repeatedly. The air is coaxed out the system with engine revs, squeezing the radiator hose vigorously by hand to agitate bubbles and pump coolant and opening and closing the bleeder bolt in the coolant elbow. Bubbles removed and no water or oil leaks!

In the early evening I turned my attention to trimming and fitting the new twin gauge pillar holder and routing the cable from the wide band 02 sensor to the cabin.

wp-1480844375395.jpg

I have drilled a large hole next the shifter opening, and fed the sensor harness back past the gearbox cross member and up through this hole with a rubber grommet. Since it is near the rotating tail shaft, I will use some cable ties to ensure the wiring is safely managed.

Tomorrow is the first day of my extended Christmas holidays, and I have nothing planned except working on the car. First up will be wiring up the wide band gauge and going through the brief calibration process. The other main job is to install the rocker arm stoppers before taking the car for its first test drive with the new turbo.

Just a quick update to say that the turbo is plumbed and ready to refit. I have used the old water lines with the new oil line. The Old oil line looked a bit grubby so I thought it was safer to use the new one. Everything has been loctited and torqued.


Next I will mount the turbo and dump properly with loctite and put the whole assembly back in the car for good.

Tonight I was able to resume work on the car and managed to complete the exhaust mods. Welding the last section was difficult due to the large gaps between the two bits of pipe. I struggled a bit but improved my technique and filled the gaps with low heat and filler material. It’s not perfect but should be sound:

wp-1480587936580.jpg

The completed setup can be seen below (left), compared with the original (right):

I spent some time smoothing the internals of the junction and even the mouth of the dump with a special sander.

The remainder of the night was spent dummy fitting the water lines for the turbo. The kit came with braided oil and water lines, but they are not very flexible and use banjo bolts. I will probably use the old braided lines because they are more flexible an have nicer Speed Flow fittings. At the moment I’m having trouble routing a water line because it used to go between the compressor cover and engine mount, but this gap is quite small on the new turbo.

There are four ports for attaching water fittings on the core so I’m sure I’ll find a combination that works well.

The last two nights have been productive. On the first night, I concentrated on cutting off the remaining piece of the wastegate pipe junction and patching up the hole. My previous TIG welding experience was limited to about 10 minutes in a TAFE course a decade ago, but I supplemented this with some YouTube tutorials.

At the start, I spent as much time grinding the Tungsten rod as actual welding after repeatedly fouling the tip. Joining different thickness metals was a difficult first task. I eventually managed to get a piece of plate covering the hole and the bung for the wide band O2 sensor. I was planning to mount it off the back of the turbo but luckily I read the instructions and saw it would melt if it were closer than 2 feet from the turbine. The spot I used is close to this, with the bung mounted on the appropriate angle to avoid heat soak and condensation.

The next day, I moved onto adapting the superfluous piping from the old wastegate pipe to be the new wastegate junction. I looked at some more YouTube videos to improve my technique which definitely paid off. A courier delivered the exhaust flanges as I was working on the pipe too, so everything was aligning.

The left over sections were ideal for modifying the pipe how I intended. I marked the material with racing crayon and used cutting discs, holesaws and grinders to shape the pieces. My welding was getting better and better too:

Not perfect but better than the existing welds on the dump pipe. The pipe currently needs one weld to complete it, which I will complete Thursday at the latest.

The picture above illustrates how the external wastegate pipe can now be completely removed to free up engine bay space when working on the car.